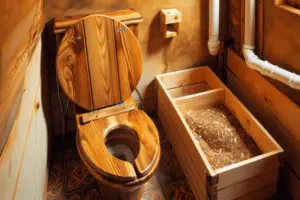
 NOTE: A DIY toilet will not have a view screen to conceal the human waste. Without a view screen, as soon as you open the lid you are staring at a a pile of poop. To me, this is unacceptable in all but the most rustic situations.
Be realistic with your estimate of costs, in terms of both time and materials.
On the plus side, they can look really nice if skillfully made in wood. They can also have much more capacity then some of the commercial composting toilets which are tiny. Less frequent emptying is better!
If you still interested, read on.
A question I frequently get asked is “is it possible for me to build my own composting toilet?”. The answer is yes – maybe. If you are reasonably handy with tools and take the time to do it right, it can succeed. Also, these are typically rustic toilets that may not perform as well as professionally designed and built composting toilets. Sometimes simpler is not better. This is one of those times.
There are a few very important things to be aware of if you are to succeed.
A Basic DIY Composting Toilet
A homemade DIY composting toilet (or ‘do it yourself’ composting toilet) may be as simple as a 5 gallon bucket with a seat, inside a wooden cabinet. These can actually look really nice, if built by a skilled woodworker. You need to use an absorbent, natural material (like sawdust) to cover the contents thoroughly after each use. Because many home built composting toilets do not have a fan or ventilation, this sawdust cover is absolutely vital – or it will stink. A general rule is to ensure the ratio of sawdust to human waste is 1:1. I have seen and used several of these. The problem is, you get the occasional whiff of odor, throughout the house.
A Better DIY Composting Toilet
Adding a urine diverting seat, and a small computer fan to a DIY composting toilet is a drastic improvement. It eliminates the need to add sawdust. If you have a square shaped bucket this would be easy. The folks at the local hardware store could sort out what you need, but essentially you want a plastic pipe installed in the rear of the toilet. This pipe is led up through the roof, where you install a vent cap (again, the hardware store people will know exactly what you need – its not complicated) . Some vents draw naturally, with the wind (you’ve seen these – they are metal, with slits, and they rotate). However, this is not as good as using a small computer fan, which can be installed where the pipe exits the box (see this video at about 2:51). You’ll have to plug that into a wall socket or battery. Another option is a solar attic vent. These are a bit pricey – maybe $200 – but they are a very nice solution, and require no wiring.
With a vent and fan, the moist, stinky air inside the toilet will be exhausted outside. The contents of the toilet will shrink rapidly, allowing much greater capacity. No additional organic material, such as sawdust, should be added. When full, the bucket is dumped into a sealed composting container on your property, where it should sit for a considerable time – 6 months to 1 year.
You can see an excellent video on building a simple homemade composting toilet here.
And a more sophisticated toilet here: How to Build a Composting Toilet
Keep in mind that almost all odor problems relating to composting toilets result from the contents being too wet. This is solved with an inexpensive urine diverting

urine diverting toilet seat
toilet seat, and drain the urine into a small pit outside of your dwelling. Or dilute the urine and use it as fertilizer. Urine contains little or no bacteria and does not pose a health risk.
With a urine diverting seat and a fan installed, your home built DIY composting toilet will rival professionally built toilets in effectiveness. If you just have a bucket with sawdust, well, it’s not as good and you could run into odor problems if all users are not careful.
I’d line the plastic bucket with a compostable plastic bag, to make emptying easier.
When the bucket gets about 3/4 full, you should take it outside, and dump it in a compost bin. This should be a sealed bin, without holes in the bottom. You don’t want the contents leaching into the ground. Here it should remain, until fully composted. It might take just a few months, or up to a year, depending on the temperature. When it has fully composted, you can put it on non-edible plants as
mulch. You actually need two bins, so one can sit for the required length of time, with no new material being added. I like the rotating drums, but there are many other possibilities.
The most comprehensive guidelines on the subject are the excellent Composting Toilet Guidelines published by the BC Government in Canada.
If you are a handy, do-it-yourself person on a very strict budget, and if you don’t mind staring at someone else’s poop when you open the toilet lid, homemade DIY compost toilets are a possible solution for the difficult problem of managing human waste. You might save $700 or $800. Personally, I’d save up a little money and buy a professionally made toilet with a view screen. The one we recommend is the Thinktank Waterless Toilet.
